Monday, September 15, 2008

Linking to a full size image...

Linking to a full size image from your thumbnails.

Create a pop-up window template:
  • Open a new blank HTML page
  • Create a simple table to house your full size image and title
For example you can create a centered table 600 px wide with 1 column and 2 rows.
You will insert the full size image into the first cell and put the image title into the second cell.
  • Save this as 'image_template' in your portfolio folder
To create individual image pages:
  • Open template you just created (as above)
  • Insert specific image into first cell
  • Write title in second cell below image
  • SAVE AS > image title (in your portfolio folder alongside image and thumbnails)


Monday, September 8, 2008

Dates!

Monday 15th September is the last class for Term 3.

There is a two week break.

Classes begin again Monday 6th October.

Monday, August 25, 2008

Portfolio images

Preparing portfolio images for your website:
  • Open image in photoshop
  • Re-size image to between 300 - 500 pixels wide
  • 'View Actual Pixels' to see actual image size
  • Save for Web (eg: titleofimage.jpeg)
Create two thumbnails for each image to use as image rollovers in dreamweaver:
  • Have open the image you prepared above
  • Select the marquee tool, make sure it is fixed size (100 px by 100 px)
  • Using the marquee tool select an area of your image
  • COPY > NEW > PASTE
  • You should now have your first thumbnail
  • Save for Web (eg titleofimage_t1.jpeg)
  • For your second thumbnail, open the original thumbnail you created above
  • Select IMAGE > ADJUSTMENTS > HUE/SATURATION
  • Change the lightness to +50
  • This will be your second thumbnail
  • Save for Web (eg titleofimage_t2.jpeg)
For each image you plan to add to your portfolio, you should have three files:

titleofimage.jpeg (actual image, resized and saved for web)
titleofimage_t1.jpeg (first thumbnail 10opx square, original colour)
titleofimage_t2.jpeg (second thumbnail 100px square, lightness +50)

All images should be saved in the portfolio folder of you website folder.

Monday, July 28, 2008

Week 19 - Setting Up a Local Site

You need to designate a local site to use as your home folder for keeping all website files.

First of all you need to create the local folder. On your USB stick create a folder for your website using the format: 'surname' 'first initial' underscore website. For example:
campbellc_website

Within this folder create four more folders titled index, portfolio, contact, links.


All the files used for your website including image files etc will be placed into these folders. You can add extra folders depending on how you wish to organise your site.

**Tip: When saving folders for the internet remember never to use spaces (always use and underscore) and all letters should be in lowercase.

Now open Dreamweaver:
  • From the menu bar select Site> New Site. The Site Definition wizard will appear, please make sure you have the BASIC tab selected.
  • Type a name for your site. Preferred format is 'surname' 'first initial' underscore 'website'. Eg: campbellc_website.
  • Click NEXT
  • Dreamweaver will ask you if you want to use its server technology tools. Please click NO at this stage.
  • Click NEXT
  • In the next window make sure the first tab is selected as you want to edit local copies on your machine. The most important part is to tell dreamweaver where to locate your Local Site folder. In the same window click the blue folder to the right hand side of the dialog box and search for your USB stick and then find your website folder that you have recently created. Click CHOOSE to select your folder.
  • Click NEXT
  • It will then ask you how do you connect to your remote server. At this stage we want to select NONE
  • Click NEXT
  • Click DONE
You have now designated a local folder to use as the 'home' folder for your website. Every single file (including image files, html files etc) that you use on your site needs to be placed into this folder.

Monday, July 14, 2008

Week 18 - Website basics

Some examples of web portfolios:
http://joesorren.com


Today is an initial introduction to creating a basic web page. We will:
- Insert text
- Insert a table
- Create a link to an external web page (e.g. your blog)
- Insert an image (the image will be re-sized in photoshop to the appropriate pixel dimension)
- Creating an image rollover (this is a good technique to use for portfolio thumbnails, as the viewer moves their mouse over each thumbnail they change from full colour to much lighter)

Sunday, July 13, 2008

Week 17 - Introduction to Dreamweaver

During the next term you will be creating your own website* to use as an online art portfolio. The program you will use to create your website is called Dreamweaver.

Your website will be made up of four pages:

  • An index page – this is the first page that people see when they type in your website address.

  • A portfolio page – this is where people will view your online portfolio of images.

  • A links page – here you will create a list of links to other websites/blogs etc that you enjoy looking at.

  • A contact/info page – this is where you will show your contact details (eg. email address) and also have a link to your CV.

This first lesson will be a brief introduction to the basics of Dreamweaver:

  • How to open a basic html page
  • Viewing the properties box
  • Inserting text
  • Inserting a table
  • Viewing your page using a web browser such as Firefox or Safari
The second half of the lesson you will have a chance to finish your artist book, update your blog or start looking around the web for inspiration for your own online portfolio. Remember you will need to keep your website simple and easy to navigate, however there is still room for creativity!

*For this exercise your website will never actually be uploaded to the web, however you will be creating a fully functioning website. To upload your site to the web you will need to purchase both a domain name and web hosting. This is something you may want to think about in the future.

Wednesday, July 9, 2008

Semester Two

Classes return Monday July 14th 2008.

See you there!

Monday, June 2, 2008

Week 15 - Next Semester

Creating a Website/Artist's Portfolio
Things to think about for next semester:

- Start collecting images of your own artwork for your online portfolio.
- Start collecting links to art related websites that you like.
- Start thinking about a personal artist's statement/C.V.

These are important elements when making your own website.

Also, take a look around the web and start collecting a list of websites that you like the look of... design, use of images, layout etc. As beginners your site will be simple but that doesn't mean it can't look professional!

Monday, May 26, 2008

Week 14 - Files for Folio Assessment

For your assessment at the end of Semester One please submit a CDR with the following files:
  • Final digital collage file
  • Three image files used to create your digital collage
  • At least three book page images
Please label your CDR with your name and your full blog URL.

Thank you!

Monday, May 5, 2008

Week 11 - Photoshop and your Artists' Book

- Become familiar with the toolbar! Here are some common tools:

If you see a small black arrow in the lower right hand side of a tool button it means there is more than one tool available, click on the black arrow to see a drop down menu of the tools that are available.

- Always have your layer and history windows open. If you can't see these windows, click WINDOW (on the menu bar at the top of the screen) and select them from the menu.

Pay close attention to the position of each layer. You can add layer styles and manipulate layers on the layer window (seen above).

- There are a few key ways to manipulate your image using photoshop. The first is using the IMAGE menu and selecting ADJUSTMENTS. Use Adjustments to alter the brightness/contrast, hue/saturation/lightness, and selective colour adjustment:


You can also alter an image using a range of different filters, these can be found under the FILTER menu. There are many different filters that will produce a range of different effects depending on your image. The best way too learn about these is to experiment!

You can also alter basic elements like scale and position of an image using the EDIT menu and selecting TRANSFORM:


It is important to think of what your book will look like as a finished artwork but equally important to use it as an excerise in becoming familiar with photoshop. Try to experiment with as many techniques as possible.

Sunday, April 27, 2008

Week 10 - Artist Book


It is now week 10 and that means only 5 classes left to complete your Artist Books!

During class time you should be concentrating on the digital images that will fill your book. Please try to work on the actual design and construction of your book at home. Of course always bring it along to class so I can see what you are up to.

Remember you are being assessed on the quality of the digital images, the digital images need to be your top priority.

Try and be imaginative as possible!

Keep an eye out for inspiration, here are some starting points:

Bonefolder (an e-journal for artist books), you can click on each volume to download as a pdf.

Making Artist Books Today
Edited by Wulf D. von Lucius and Gunnar A. Kaldewey
Stuttgart : Lucius & Lucius, 1998

Creating Artists’ Books
Sarah Bodman
London : A & C Black, 2004

The Book as Art: Artists' Books from the National Museum of Women in the Arts
Drucker J, Wasserman K, Niffenegger A.
Princeton Architectural Press, 2006

Artists' Books on Wikipedia

Search the library and remember Google and Flickr image searches!

Monday, April 14, 2008

Week 9 - Artist Books

Some examples of artist books:


For more inspiration visit the library (The State Library of Victoria has a great collection of artist books). You can also do a google image search or a search through flickr.

Wednesday, April 2, 2008

Week 8 - Artist Book

Project Three: Artist Book

This project is designed to allow you to explore a combination of found and appropriated imagery and to further expand on the skills you have developed when making the digital collage. Your artist book will be made up of a series of at least 8 digital images that you will create and print in class.

Please research book making techniques, you can be as imaginative as you like when it comes to the construction of your book! However try to complete as much of the design and construction of your book at home, leave the class time to work on your digital images.

Monday, March 10, 2008

Week 5 - Public Holiday

Don't forget that there is no class on the 10th March due to the public holiday.

Have a lovely weekend!

Monday, February 25, 2008

Week 3 - Saving images for the web

It is important that you are able to save digital images for the web using photoshop as you will need to upload images to your blog.

Remember, images saved to use on the internet are measured in pixels. When preparing your image in photoshop select IMAGE/IMAGE SIZE to change the pixel dimension. When saving your image select FILE/SAVE FOR WEB. Save your image as a jpeg file and make sure the size of the image is under 50k.

To get an idea of pixel dimensions, the image below is 320 pixels wide:

Monday, February 18, 2008

Week 2 - Creating a Blog

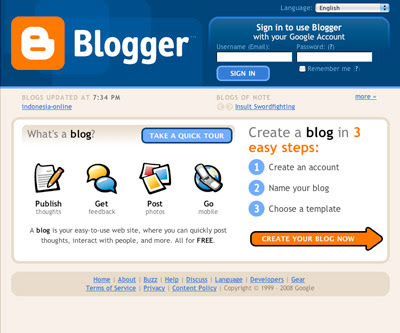
You are required to create a blog using BLOGGER.

www.blogger.com

When setting up your blog it is very important to remember your log-in details and also the web address of your blog.

Your blog is to be an on-going journal/visual diary documenting your work-studies throughout the semester. In addition to documenting your own work your blog should become your virtual 'scrap-book' and include a collection of inspiring imagery, text, links to other websites etc.

Sign into blogger using your username (email address) and password:


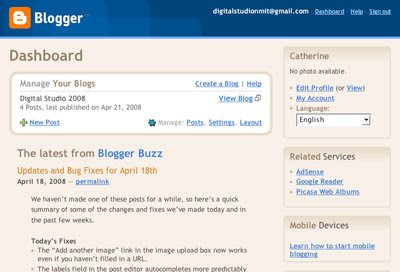
Once you have successfully logged in the 'Dashboard' will appear. Here you can click to select:
New Post - to create a new blog post
Posts - to view all your previous posts (to edit previous posts)
Settings - To change the settings of your blog (privacy, comment settings etc)
Layout - To change the look of your blog


Click on New Post to begin a new post and the following will appear:


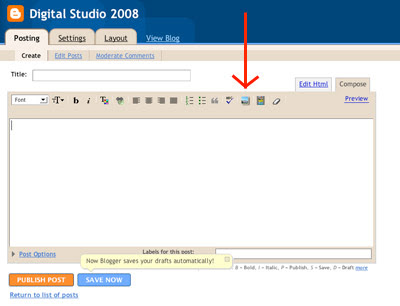
To add an image to your post you can click on the image button (that's what the red arrow is pointing at!).

Once you have finished your post click PUBLISH POST. This will automatically save your post and upload it to your blog.

If you would like to save your post as a draft to work on at a later date then select SAVE NOW.

Monday, February 11, 2008

Week 1 - Assessment Folio

Digital Studio

Studio and Material Studies VBS 643
Monday 6-9pm

Semester One - Assessment Folio

Your folio for semester one will include:

1. BLOG
An on-going journal/visual diary documenting your work-studies throughout the semester.
It must include:
- At least twelve entries
- Profile information
- Links list
- Banner image

2. DIGITAL COLLAGE
A collage created using scanned images and manipulated in Photoshop. The digital collage will be presented as a finished artwork, printed on fine art digital printing paper and signed.

3. ARTIST BOOK
An artist book created using a variety of digital techniques. The book will include at least eight images and be printed on fine art digital printing paper and then assembled.

4. DIGITAL ARCHIVE
Students will be required to create a CD containing files used throughout the semester. This CD will demonstrate and ability to archive work and will include:
- Completed digital collage (saved at 300 dpi)
- At least three image files used to create the digital collage (from original scans for example)
- Blog banner (saved for web at 72 dpi)
- All finished images used to create artist book